Remove and Install Coupe Vent Window Gasket
Remove Vent Window Gasket
Facts:
- Removing the two screws on the front of the window frame allows the frame to be lifted
slightly so the window can be removed from the top pivot.
- The gasket rubber holds the pivot pin in place. I did not try this but you might be able to
get the window out by removing the window gear mechanism and pressing the window
down hard into the gasket. Removal would require that the window be turned at the
correct angle for removal -- about half way open. The pin is about 1/4" long.
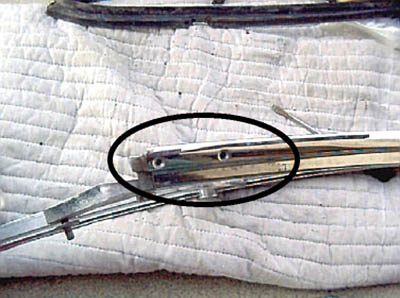
- The metal extrusion on bottom of window (with a flat end) must be pulled out at a
specific angle. The hole it fits through is oblong.
- Gasket is held in the window frame grooves by pressure and friction. No adhesive is used.
- The rubber tabs on the bottom of the window have "hips" that fit through the slots in the
window frame. This holds them in but makes it difficult to remove them without
damaging the gasket.
- The "pin" in the upper pivot is about an 1/4" long.
Procedure:
- Remove door panels.
- Remove window gear mechanism (the window should move freely).
- Remove the two screws in the front of the window frame.
- Carefully lift the metal cover that the screws held tight.
- While lifting the metal cover work the window down till the pin comes free.
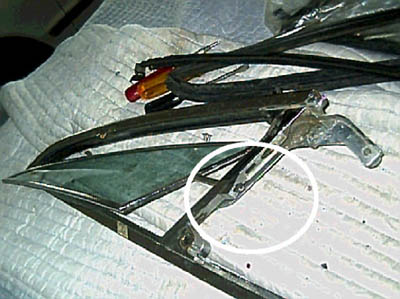
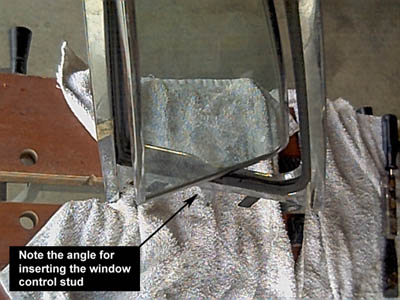
- Turn the window to about 1/2 open -- you will have to fiddle with the angle to get it right
- till you can work the rod up and out of the gasket. The angle is critical because the hole
for the rod is an oblong opening. The rod can only be removed if it is at the correct angle
to the hole. (2 pictures)
- Once the window is out try to press the rubber tabs up through the frame with a small flat
screw driver. The tabs have "hips" that keep them in place and make it difficult to pull
them out. Note: I did not do this step on the coupe. I don't know for sure if there is access
to the rubber tabs with the frame in the door.

- Remove the rubber gasket from the bottom first then gently pull away from the frame
going toward the front and working your way to the back. The rubber comes out easier in
this direction.
Now we are ready for the install.
Install Vent Window Gasket
Facts:
- I installed the gasket with the frame on a bench. Actual install in the door it may be more
difficult.
- There does appear to be a correct sequence to do the install. Naturally I picked the wrong
one the first time. It has to do with starting with the front or back if the gasket first to
make the process more managable.
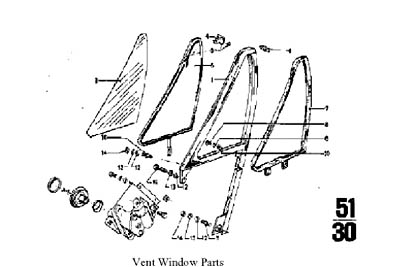
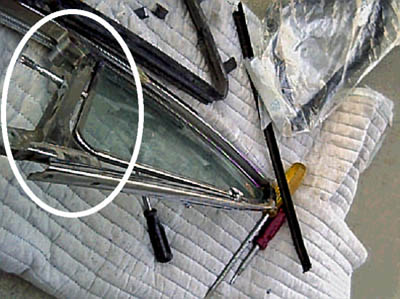
Vent Window Parts
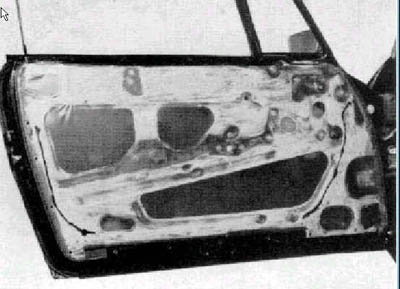
Door Picture 1 (from Shop Manual)
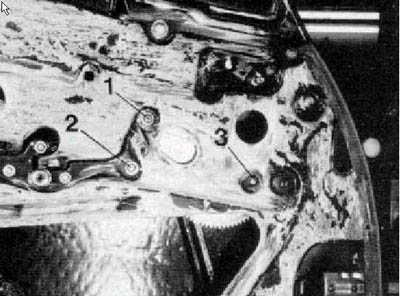
Door Picture 2 (from Shop Manual)
Tools:
- Flat blade screwdriver
- A flat, thin, stiff blade ñ I used a 11/2î putty knife but it may be too sharp for the real
install. A plastic version with the blade dulled is probably safer.
- A lubricant ñ I used ArmorAll but I think any lubricant safe for rubber is OK.
Procedure:
- Spray the gasket and the frame with the lubricant. Be generous it makes the install easier.
The reason for spraying the frame is so small adjustments can be made later.
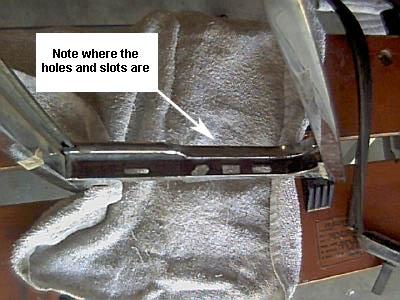
- Note how things line up on the bottom of the frame ñ tabs, drain holes and the angle for
reinstalling the window. Might be a good idea to make a drawing showing the angle. This
will be important later on.
Bottom of window frame
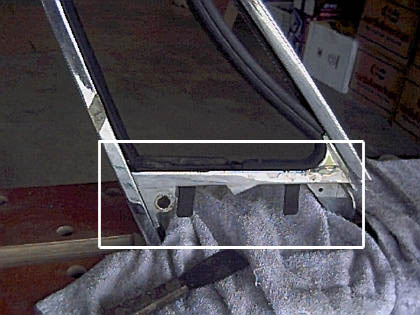
- Install the rubber tabs in their frame slots. At this point you can pull the tabs into position
with the ìhipsî in the bottom of the frame. You can probably wait and do this step later
but the tabs will help hold the gasket during the install.
Tabs in slots
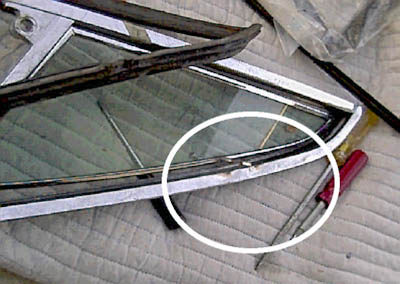
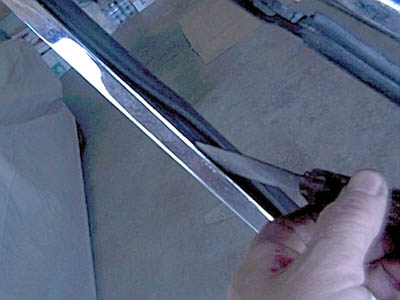
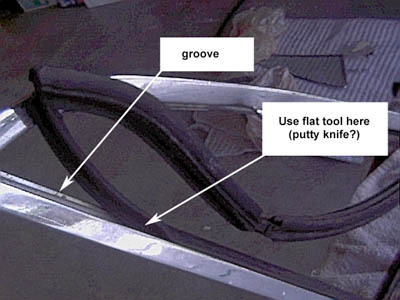
- Starting at the back of the frame insert the gasket into the groves in the frame. This will
be the hardest part. Part of the gasket goes on the outside of the frame and an inner part
fits into a grove. I used the putty knife to get the inside part into the grove. Hold the
gasket tight against the frame while you push the inside gasket into the grove. Work the
gasket all the way up the frame until it is completely installed in the back side.
Backside Picture 1 ñ use of putty knife
Backside Picture 2 ñ the grooves
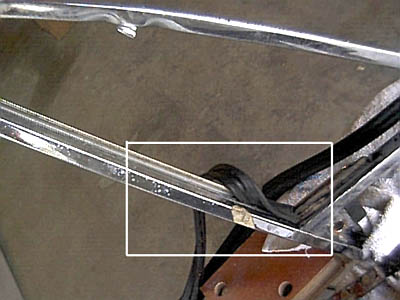
Backside Picture 3 ñ inserting the gasket
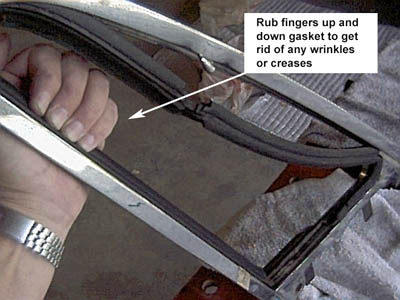
- If you end up with a wrinkle or crease in the backside gasket use your fingers for pressure
and slide them up and down the gasket. This is where the lubricant on the frame pays off.
Backside Picture 4 ñ removing creases
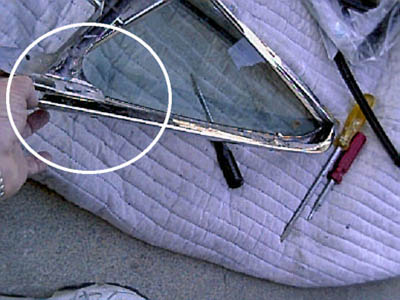
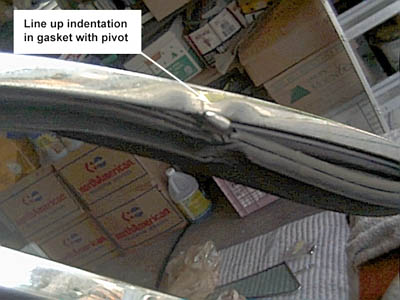
- Once the backside is installed up to the top arch begin to insert the front of the gasket into
the grove. This side will be easier because the gasket and grove are wider and more
flexible.
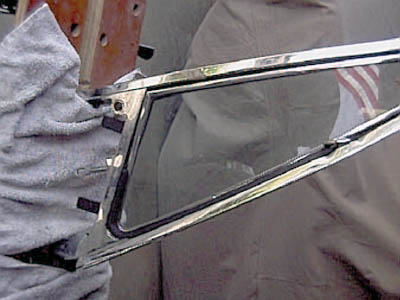
Front side Picture ñ pivot point
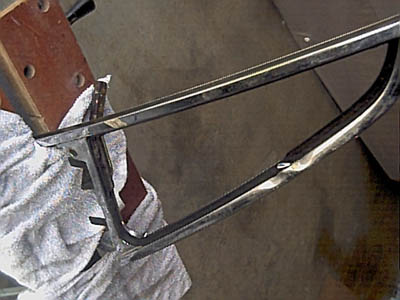
- Complete the front side install and make sure the gasket is tightly installed all around the
frame.
Gasket Installed
- Now line up and install the window. A good time to lube the pivot as well.
Installing Window
- All done with the window ñ replace the screws and make sure the gasket is correct all
around the frame. Reinstall the controls and test it out.
Completed Installation
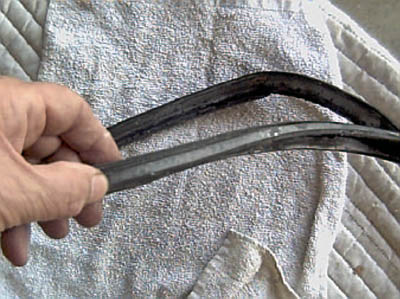
- The new gasket looks like it would go in easier than the old one I used to learn on. The
rubber is softer and more pliable. I sure hope thatís the case when I do the real thing.
New Gasket 1
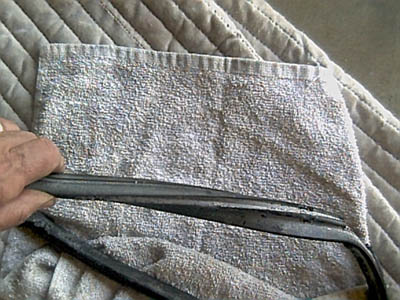
New Gasket 2
Hopefully this information will be helpful. As I said in the beginning I did this on the bench
not in the coupe so your process may have to be modified to accommodate hurdles I did
encounter.
When I actually do my coupe windows Iíll update this procedure to account for any
differences in the real installation.